Latest Updates
Showing posts with label HO Scale. Show all posts

Brick Freight House - Starting the Build

The Brick Freight house is the first kit offering from Monster Model & Laserworks. I did a quick rundown through the components and quality last week and mentioned a few minor annoyances with the instructions. You can find that original post here: Test Fit

This weekend I decided to take a break from painting and gaming and get started on this kit. I grabbed my clamps and glue and took it north with me to start the fun.

As anticipated from the dry fit, the kit almost fell together. Well, maybe not fell together, the tabs and slots are pretty tight fits over all. As you will be able to tell from the photos you really can't have to many clamps and I made use of just about everything I had. At this stage the most difficult assembly turned out to be the roof. Since it has a border all the way around the edge this had to be lined up and clamped down with nothing to really line things up against. Then you have to very carefully separate the drainage grates from their sprue. That turned out to be the hardest part of the kit so far. You need 11 of these grates and there are 12 on the sprue. I only managed mangled one of them and that was when I was trying to pick it up to glue it onto the roof.

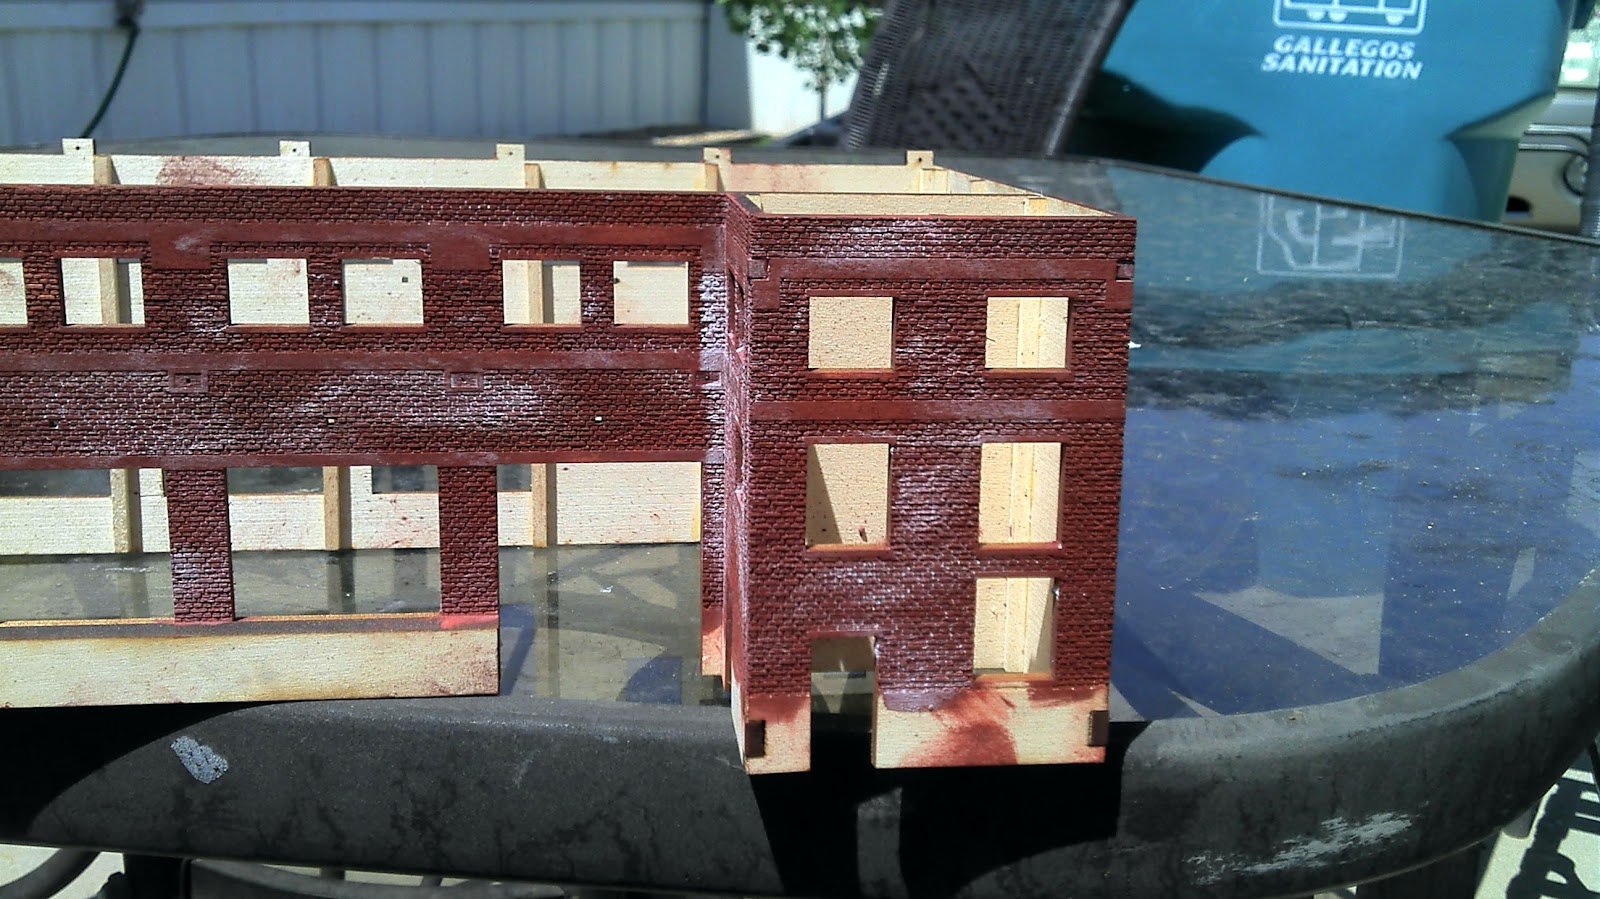
Some initial paint work was done at this stage as well. I followed the kit instructions for this and grabbed some of my MIG powders and 99% Isopropyl alcohol and went to work. Essentially you are mixing up your own paint and you need to lay it on thick enough to hide the grain of the wood. I think I managed that part pretty well. The next step is to apply a thick layer of dullcote and this is actually going to "frost" the brickwork to create the mortar lines. If the "frosted" effect is to much then you can dab the alcohol back on the surface to restore the color. I only managed to pull off the effect on a about a 1/3 of the model. I haven't gone back with pure alcohol yet to reduce the areas that are to frosted. I'm a bit undecided on how I will proceed with the painting at this point. I didn't have any black paint so the roof remained unpainted at this point. I need to build the optional clerestory for the roof before I go much farther with that anyway.

Over all I made good progress, moving at a moderate pace to make sure everything dried properly before moving on to the next. Fortunately, I live in a dry, high altitude climate and things tend to dry pretty quickly.
Now on to the pictures.

Not in any particular order but these pictures show the bracing being clamped into place.


Here the structure is being clamped together.


 Here's a quick test; dry fitting the roof to make sure everything is still square. It is!
And the roof clamped up


 My assortment of clamps. I used them all!
 Lunch time!
And then a couple of hours for everything to set and the brushes come out.
Mmm, this seems to be working.


And the next day after I have applied the dullcote. You can see the deliberate "frosting" effect. I wonder if this is a reaction between the alcohol and the lacquer based dullcote, but then why didn't it work over the entire building?




The Brick Freight House HO Scale - Test Fitting

I had a chance to really take a good look at this kit from Monster Model and Laserworks and pull the parts out of the box and work my way through the assembly and painting instructions. Translate this to I remembered my paints but left the miniatures I was going to work on at home. However, this is something that I have wanted to do since I got the kit. First thing was to inventory the parts against the listed parts in the assembly instructions. No problems everything there and was either clearly labeled or pretty darn obvious based on the pictures in the instructions. Bonus, everything is there! I actually figured it would all be there so I didn't anticipate any problems. I'm very pleased with the detail on this kit, especially the brickwork. This one will be right up in front of everyone when you are looking at the layout. I think this will be the stand in for Commonwealth Steel  on my version of the "Patch".

Next up step through the instructions, identify the parts for each step and make sure that everything made sense so I wouldn't run into any problems when I had the glue and clamps out for the real assembly. All the major components (the walls and roof) fit together beautifully as you can see in the pictures below.

It was at this point that I did kind of stumble through the Instruction Manual, and this is a pretty minor quibble on my part, but a bit irritating. The Instruction Manual clearly indicates it will be indicate when you should paint certain parts in which case you would refer to the details in the painting and weathering instructions. So far so good. My issue is that the painting and weathering instructions also contain the assembly instructions for a number of the sub assemblies like the windows and concrete loading platform on the rail side of the building. On top of that there are two #5 steps in those instructions, one for assembling and painting the rear platform and another one for painting and weathering the roof. Plus the the instructions in the painting and weathering booklet are not really in order. It would have been much easier for them to match up with the Instruction Manual.

Let me emphasis though that the instructions are well written, clear and include very good pictures of the kit being assembled. I followed through them without any problems. The painting and weathering instructions include some techniques that I haven't tried before and I'm eager to give them a try and see how they work out. I think this kit is going to pretty much fall together, if I had my clamps and wood glue with me I would have started to assemble this one today.

I have some pictures below of the kit "dry-fitted" together and it together very well since it uses a tab and slot construction that is kind of a hallmark of laser cut kits now. I have included a half inch die for my wargaming friends to get a better sense of scale. I did pre-order this kit and received the clerestory for the top but I didn't have that kit with me today.

This is the freight truck side of the building and will be the portion that visitors will be seeing on the "Patch"


 Here we see the long brick side wall and the rail side of the building. This will probably only ever be visible in photographs once its installed on the layout.

Here is a close up shot of the laser etched brickwork. Awesome stuff! The die in the photograph is a standard 1/2" die to give wargamers a sense of scale.