Latest Updates
Showing posts with label Wild West. Show all posts

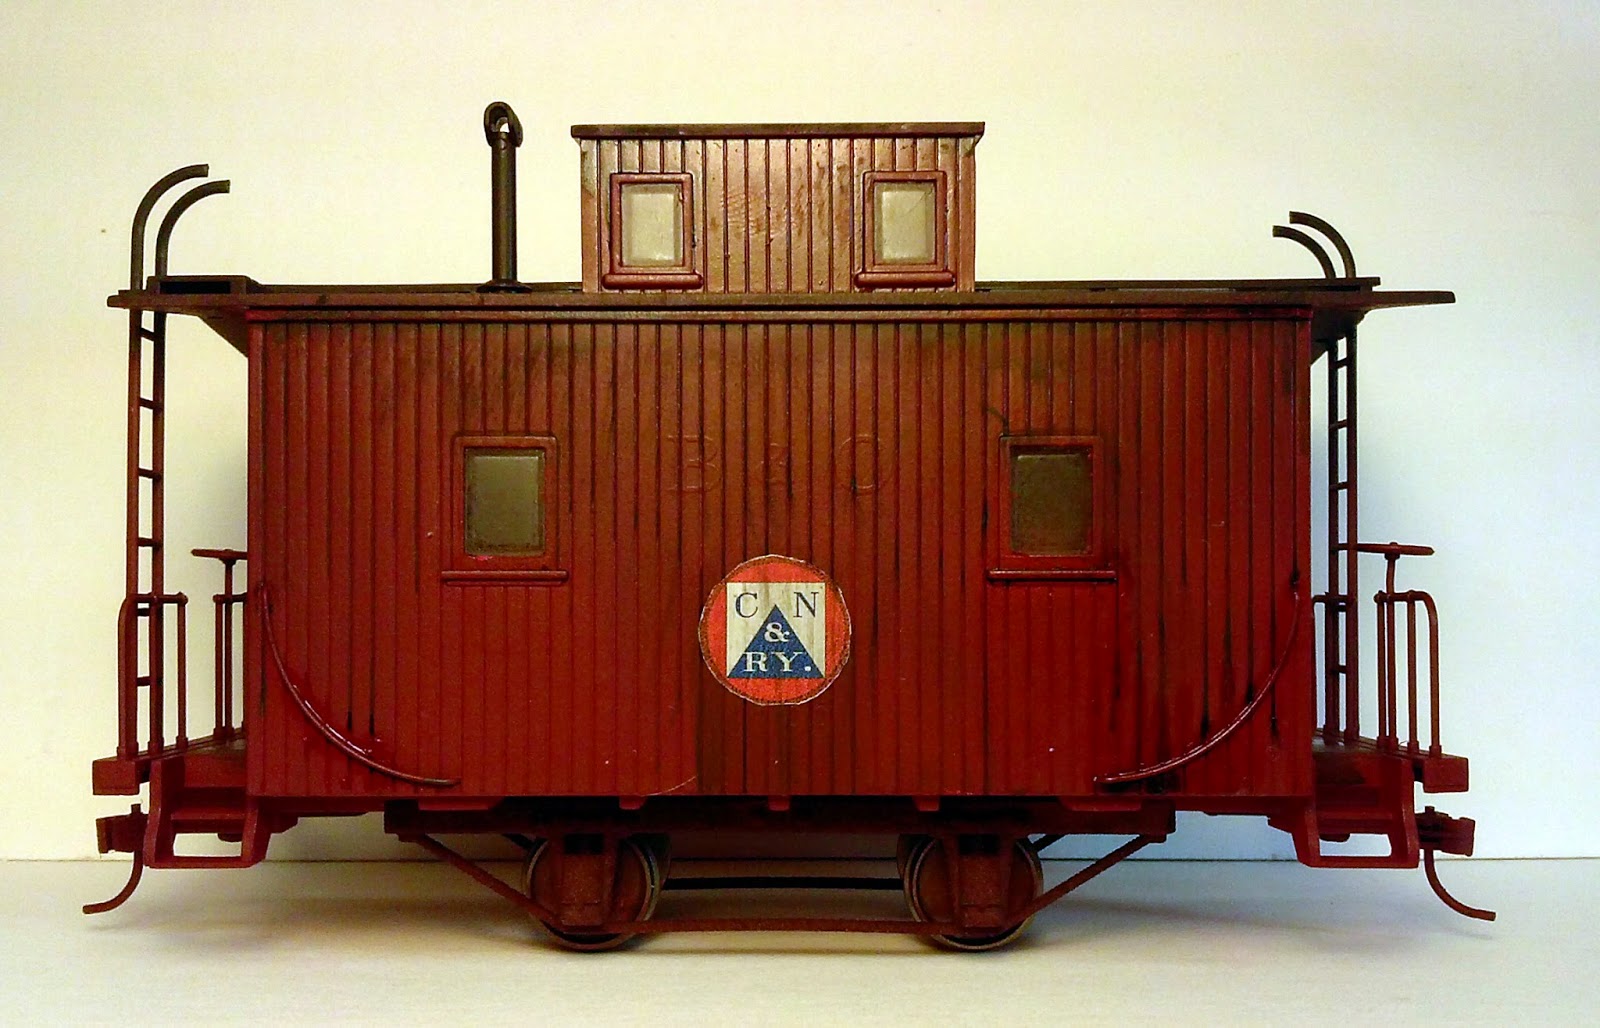
Tail End of the Train - C&N adds a Caboose

Bachmann makes a pretty generic caboose, unfortunately its an 8 wheel caboose and I really wanted a 4 wheel "bobber" caboose for the C&N to match the two that they had. At some point on eBay I stumbled on a 4 wheel setup and I bought 2. I have been a little reluctant to work with them as they seem to be a little fragile. I removed the regular trucks and mounted up the 4 wheel truck last night. Popped some wheels on there and I was done. I'm still not sure about the look so I'm going to go ahead and hold often converting my other caboose.

I had already airbrushed my chosen tru-color paint onto a bunch of freight cars including the cabooses. At this point I just added the two C&N logo decals and I was ready to go. I gave it a quick spray with the dullcoat and let it dry. I figured since I already had all my weathering stuff out I may as well work on weathering it up.

Its a little heavy and it looks patchy in the pictures but it looks okay when I hold it in my hand and give it the 2' test.

So the results of this evenings endeavors:

The base coat of paint was already on my intended victim

Added a decal to each side. The C&N didn't number their cabooses.


Applied the soot first, let it streak down the sides


Applied rust both with a prismacolor pencil and a rust effect paint


Applied the dirt, doesn't look this patchy or this heavy in person. I may have to go back over it and lighten the effect.

Little lighter on this side. Definitely need to get a brush in there and even the powder across the surface.

A Reefer for the C&N and Calamity

Believe it or not (and I know you model railroaders do) the refrigerator car did indeed exist in 1880. I managed to acquire one of Bachmann's privately owned Reefers on Ebay for a good price although not quite the one I really wanted but I am on a budget for these things. Its pretty pristine right out of the box so I decided to take an evening and do a little weathering. Not my best work but good enough is sometimes all I need. It at least looks like its been in the great outdoors for a bit.

Pictures always tell the story better than me so here we go:


The John Howard Refrigerator Car

A quick fade using thinned down Liquitex ink

Adding some soot, I think I over did it at this point

The other side

Adding some dirt to the bottom

Added some rust but overall not feeling good about it

Trying to get the soot to streak down between the boards

Happier with this now

The beauty shots


Calamity Gets a New RR Station - Part 10

The RR Station has been sitting off to the side of my work area for just over a month now with now progress, although it has served as a handy spot to set my decals on. If this was just a model for one of my train layouts (yes, plural) that would be one thing, but its a gaming piece and not even just a gaming piece but one of my "Hero" buildings. As such I need to be able to get to access the inside which means being able to get to both the first and second stories. With a regular structure this wouldn't be terribly difficult but the roof on this one is also a little complicated. I sat at my desk contemplating the second story and figured that I could at least start laying out where the interior walls could go.  As I contemplated this I realized that the whole second story could turn out to be rather flimsy so how could I fix that?

I decided that I would at least make some rafters and see if that would help the though process. I made these while watching Zulu (again!). Then I decided I could, at least, cut the interior walls for the two many rooms and see how that might fit together. Once I had the walls cut and kind of stacked everything together ideas finally started coming. I think that to add strength I'm going to only have half the roof come off. So I think I'm going to take the rafters and cut them roughly in half and permanently glue the bottom half to the interior walls and bottom edge of the floor. So far the clearances seem to indicate that it will work. There will probably only be a couple of the complete rafters included as fingers and minis need to be able to fit inside the building. Hopefully, this will get the process jump started again and I can get this building finished and off the workbench.


I have a couple of pictures from last night and since pictures are like bacon I figured I would include them.


The dilemma; There are no side walls, only roofs.

Well I need some rafters, here's one way to make sure the angles are good and add a bit of trim to the gable which helps finish it off.

Let's reinforce it so I can mess around with it a bit

I'm thinking so I think I make some more. They should be useful for something.

Well, I know I need some short interior walls.

And finally at work today, I may have figured it out. All except how to actually make that complex part where the two roofs come together.

Calamity Gets a New RR Station - Part 9

I started to assembly the first floor of Calamity's railroad station over the weekend. Its been a rough assembly to say the least. Between dropping parts and breaking glue joints (learn to let the glue set!) I did finally manage to get the first floor together. I even remembered to put the raised floor in on the baggage/freight side of the building. Its still lacking some of the necessary interior details (like the two interior walls) but I think I'm going to take a break for a few days before getting to that.

Overall I'm pretty happy with the how the things are looking. I did not get the floor get exactly right but a little trimming combined with the exterior platform should hide those mistakes, that's what I'm hoping for anyway.

On to the construction photos!

So I approached this as four sub assemblies. This is the waiting room side.

Trackside Windows

Townside

Baggage room side

Corner clamps and blocks of steel

Trying to glue it to the floor! Those steel blocks weight 1# each or so

Waiting room side. I have had these corner clamps for about 35 years


Inside Trackside

Another view of the trackside window bay

Maybe that joint will hold this time

One of my small 90 degree angle blocks

One for each corner

I think they will hold now

Let's try getting that bay window together again

Something easier, the raised interior floor for the baggage room

And a little paint on the floor

Okay, maybe I'll try putting together the broken pieces directly to the floor

A little scale. I like the height of the modified S Scale door

Finally starting to come together

Just the trackside bay window left to go

Okay, it looks like its going to stay together, just going to anchor that corner to the table for a while

And clamp that corner

Looking good from the ground though

Town side

Yea, still missing the door to the baggage freight room.

Tracksdie


Looks pretty roomy in there without the walls

And a fuzzy shot showing the difference in height. And yes, those windows really are suppose to be there. The interior wall here will have door to the baggage/freight room, I'm guessing I should put a couple of steps up to the door to make things easier on the inhabitants