Its been a long road but the Lysette miniature has finally arrived. Lysette is the CMPA mascot for Tacticon the smaller of the two gaming conventions here in Denver. The concept art for this piece can be found on the front page of this blog on the right side. She's hard to miss. The original green was sculpted by Gene Van Horne and he delivered that to my hands. While I was kind of touring the local FLGSs she was stolen. Great despondency followed, I'm still not sure why anyone would still a unique green like that, its not like they would ever be able to show it to anyone or cast it without everyone in the Denver Metro area knowing that they had stolen it. However, I digress a bit. Gene was unwilling to do another sculpt so another up and coming sculptor was found that was eager to take a shot, Chad Hoverter.
I think he did a splendid job and I did my best to make sure the uniform was as close to correct as we could make it. It didn't have to be perfect but it did need to be close and there were a number of online discussions to make sure that it looked the part. Anyway she is off being cast now and she should be available by Tacticon. There are two versions of her faithful campanion Louis XIX. One is bigger than the other and that one is sculpted by Chad. The second is a bit smaller and that one was sculpted by Jason Weibe.
I'm looking forward to Lysette finally hitting the streets.
When she is available for sale you will be able to find her here (and no, she is not there yet but while you browse check out the concept artwork for the Russian artillery crew, you will have the option for either horse or line artillery): Rastl World Minis
Home » All post
US Mars Rover "Curiosity" Landing
This is a pretty amazing image. This is a shot of the latest Mars Rover, name Curiosity, making its parachute descent. This was photographed by Mars Reconnaissance Orbiter, an incredibly lucky photograph. This rover uses a plutonium battery, it should easily exceed its two year mission parameter. You can go here for more shots of the event: Mars Rover Curiosity
Its really been an exciting year for space programs.
Posted
at 2:38 PM
Read more
Reaper Miniatures Kickstarter - Bones
I don't do this very often but this is just to much of a good thing. Reaper Miniatures has developed a line of unpainted plastic miniatures they call Bones. I have played around with this stuff a little bit and its pretty amazing. Its a bendable white plastic that you can paint directly on to without priming. Don't thin your paints for this (or thin very little) step. After that its like painting any metal/resin miniature. The Bones line is pretty much coming directly from the metal Dark Heaven line (I do see a few miniatures coming from the Warlord Line in there) and there are even some new original sculpts as well. There seems to be little if any loss of detail between the metal and plastic versions.
This kickstarter is designed to get a lot of minis in production and expand the line quickly. Like any injected plastic the upfront costs for the molds are high but the production costs are quite low. Right now the sweet price point is the $100 Vampire level which includes 97 miniatures and there will be 102 if the next couple of stretch goals are met (which seems very likely at this point). Like a lot of kickstarter projects there are some optional extras; A pair of Fire Giants - $10, A pair of Frost Giants - $10, a Dragon for $10, they just revealed a big storage case today as part of one of the stretch goals for $25. If you are into fantasy miniatures and have the need for a bunch of different types as NPCs and Monsters then this one is well worth getting into. Go check it out at: Bones Kickstarter
Posted
at 2:15 PM
Read more
Brick Freight House - Starting the Build
The Brick Freight house is the first kit offering from Monster Model & Laserworks. I did a quick rundown through the components and quality last week and mentioned a few minor annoyances with the instructions. You can find that original post here: Test Fit
This weekend I decided to take a break from painting and gaming and get started on this kit. I grabbed my clamps and glue and took it north with me to start the fun.
As anticipated from the dry fit, the kit almost fell together. Well, maybe not fell together, the tabs and slots are pretty tight fits over all. As you will be able to tell from the photos you really can't have to many clamps and I made use of just about everything I had. At this stage the most difficult assembly turned out to be the roof. Since it has a border all the way around the edge this had to be lined up and clamped down with nothing to really line things up against. Then you have to very carefully separate the drainage grates from their sprue. That turned out to be the hardest part of the kit so far. You need 11 of these grates and there are 12 on the sprue. I only managed mangled one of them and that was when I was trying to pick it up to glue it onto the roof.
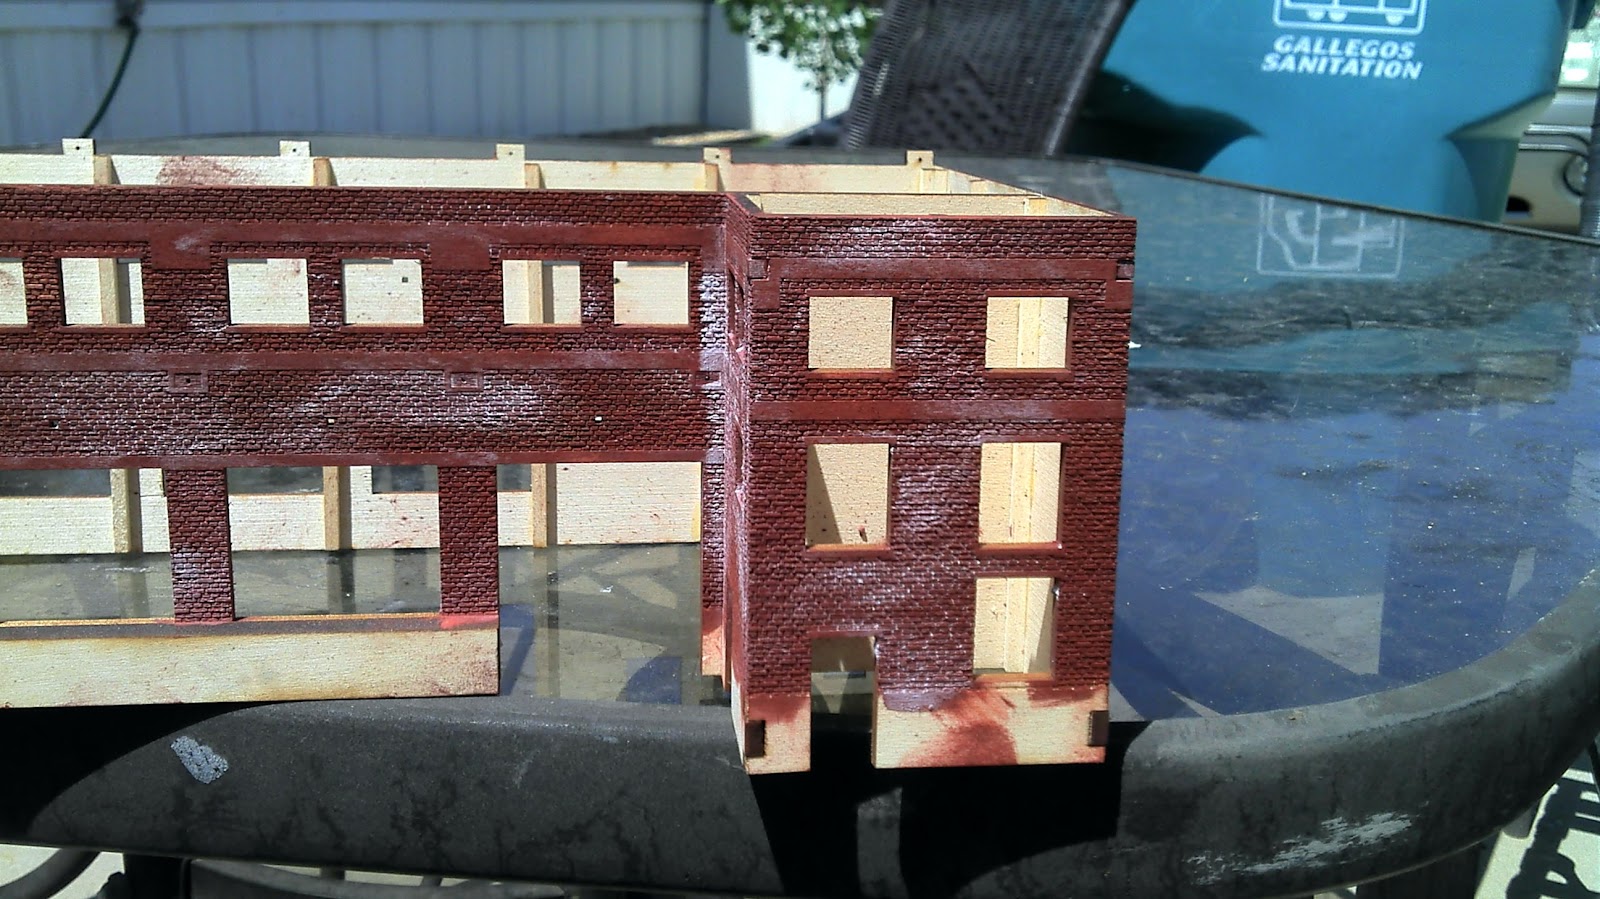
Some initial paint work was done at this stage as well. I followed the kit instructions for this and grabbed some of my MIG powders and 99% Isopropyl alcohol and went to work. Essentially you are mixing up your own paint and you need to lay it on thick enough to hide the grain of the wood. I think I managed that part pretty well. The next step is to apply a thick layer of dullcote and this is actually going to "frost" the brickwork to create the mortar lines. If the "frosted" effect is to much then you can dab the alcohol back on the surface to restore the color. I only managed to pull off the effect on a about a 1/3 of the model. I haven't gone back with pure alcohol yet to reduce the areas that are to frosted. I'm a bit undecided on how I will proceed with the painting at this point. I didn't have any black paint so the roof remained unpainted at this point. I need to build the optional clerestory for the roof before I go much farther with that anyway.
Over all I made good progress, moving at a moderate pace to make sure everything dried properly before moving on to the next. Fortunately, I live in a dry, high altitude climate and things tend to dry pretty quickly.
Now on to the pictures.
Not in any particular order but these pictures show the bracing being clamped into place.

Here's a quick test; dry fitting the roof to make sure everything is still square. It is!
My assortment of clamps. I used them all!
Lunch time!
And then a couple of hours for everything to set and the brushes come out.
Mmm, this seems to be working.
This weekend I decided to take a break from painting and gaming and get started on this kit. I grabbed my clamps and glue and took it north with me to start the fun.
As anticipated from the dry fit, the kit almost fell together. Well, maybe not fell together, the tabs and slots are pretty tight fits over all. As you will be able to tell from the photos you really can't have to many clamps and I made use of just about everything I had. At this stage the most difficult assembly turned out to be the roof. Since it has a border all the way around the edge this had to be lined up and clamped down with nothing to really line things up against. Then you have to very carefully separate the drainage grates from their sprue. That turned out to be the hardest part of the kit so far. You need 11 of these grates and there are 12 on the sprue. I only managed mangled one of them and that was when I was trying to pick it up to glue it onto the roof.
Some initial paint work was done at this stage as well. I followed the kit instructions for this and grabbed some of my MIG powders and 99% Isopropyl alcohol and went to work. Essentially you are mixing up your own paint and you need to lay it on thick enough to hide the grain of the wood. I think I managed that part pretty well. The next step is to apply a thick layer of dullcote and this is actually going to "frost" the brickwork to create the mortar lines. If the "frosted" effect is to much then you can dab the alcohol back on the surface to restore the color. I only managed to pull off the effect on a about a 1/3 of the model. I haven't gone back with pure alcohol yet to reduce the areas that are to frosted. I'm a bit undecided on how I will proceed with the painting at this point. I didn't have any black paint so the roof remained unpainted at this point. I need to build the optional clerestory for the roof before I go much farther with that anyway.
Over all I made good progress, moving at a moderate pace to make sure everything dried properly before moving on to the next. Fortunately, I live in a dry, high altitude climate and things tend to dry pretty quickly.
Now on to the pictures.
Not in any particular order but these pictures show the bracing being clamped into place.

Here the structure is being clamped together.
Here's a quick test; dry fitting the roof to make sure everything is still square. It is!
And the roof clamped up
Lunch time!
And then a couple of hours for everything to set and the brushes come out.
Mmm, this seems to be working.
And the next day after I have applied the dullcote. You can see the deliberate "frosting" effect. I wonder if this is a reaction between the alcohol and the lacquer based dullcote, but then why didn't it work over the entire building?
Posted
at 10:24 AM
Read more
Subscribe to:
Posts (Atom)