Latest Updates

Trio of Old West Buildings - Battle Flag

I ordered three more Battle Flag buildings for Calamity at the end of December and I finally found some time to get them together. I really thought the detail on the first three that I built was really good (Saloon, General Store and Photographer's Studio), but the detail on these goes a notch higher. The window treatments on all three really stand out. They are all constructed from layering up 2 pieces of 1mm MDF to increase the level of detail. This applies to the shutters on the Gunsmith and Sheriff's office and the windows and front door on Undertaker's place. In fact the front door on the Undertaker's Building is layered up from three pieces of 1mm MDF. I really love this attention to detail. That's why I'll be making sure that the Battle Flag buildings will be the center of attention in Calamity. My concept for what I want the town of Calamity to be has grown from a simple gaming board to very much a display board. I still intend it to use it for gaming but I'm going to strive to bring the level of detail up way beyond your average convention game. I just hope my grand plans don't exceed my abilities.

Back to the Battle Flag buildings! Each building had its own dedicated instruction book and overall these are really good. I think some additional pictures for building the stairs for the Undertaker's building would help as I struggled with these just a little bit. Some larger pictures would be good too, my eyes are getting old! I didn't really have any problems with the way the pieces fit together although I would still recommend drying fitting everything together at least once to be sure you glue it together correctly the first time. I also experimented with gluing the walls together first and then fitting them to the base rather than following the instructions in the booklets. Overall this worked well for the Gunsmiths building, it worked okay for the Sheriff's office (the difficulty here is working around the odd shape of the building, and it worked pretty good on the Undertaker's place as well. It does feel like you need a third hand trying to do it this way though. If you have a couple of buildings to work on you might try it both ways to see how it works for you. The threaded clamp that I have fit on all three Battle Flag buildings and that went a long way in making my method work. (I purchased that clamp from Micro-Mark.)

I have cut down the number of construction pictures, if you really need to see how I clamp things together then you can check out my previous posts about the first three Battle Flag kits I built. You may notice that I acquired two more of the 2x3 blocks. Micro-Mark has been out of these for a while now but I found another source for them. These two are more precision than the first two and come with their own case as well as the bolts and hex nut wrench to actually screw them together.

I'll start off with the Gunsmith's Building. I decided on this building because of the shutters for the windows, I don't have any buildings with this feature and I wanted something that was a little different from everything else I have done.

Building in a Bag

The instruction book with an inadvertent shadow of me 

Three of the parts sheet, the 1mm MDF sheet is off to the side.

Sub Assemblies ready to be glued together.

A close up of the window frames with shutters.

Sub Assemblies all finished. Sign is not glued on.

Trying out the corner clamp. Works good!

Gluing the structure to the base

Add some weight to the floor while the glue dries.

Back on the home workbench with real light!


And our favorite huckster giving some sense of scale and style!
Now on to the Sheriff's Office. Calamity will have both a Sheriff (local and elected by the residents) and a Marshal (Federal). I wanted the Sheriff's office because of the interesting shape of the building and, well, I need one. I haven't decided if Calamity's Sheriff will be a good guy or a bad guy yet.

The instruction book for the Sheriff's Office

And a look at the parts

Some of the sub assemblies

  
Walls are glued up and the floor is being weighted down.

The Front side without the porch roof

The back with a good look at the exterior of the jail cells.

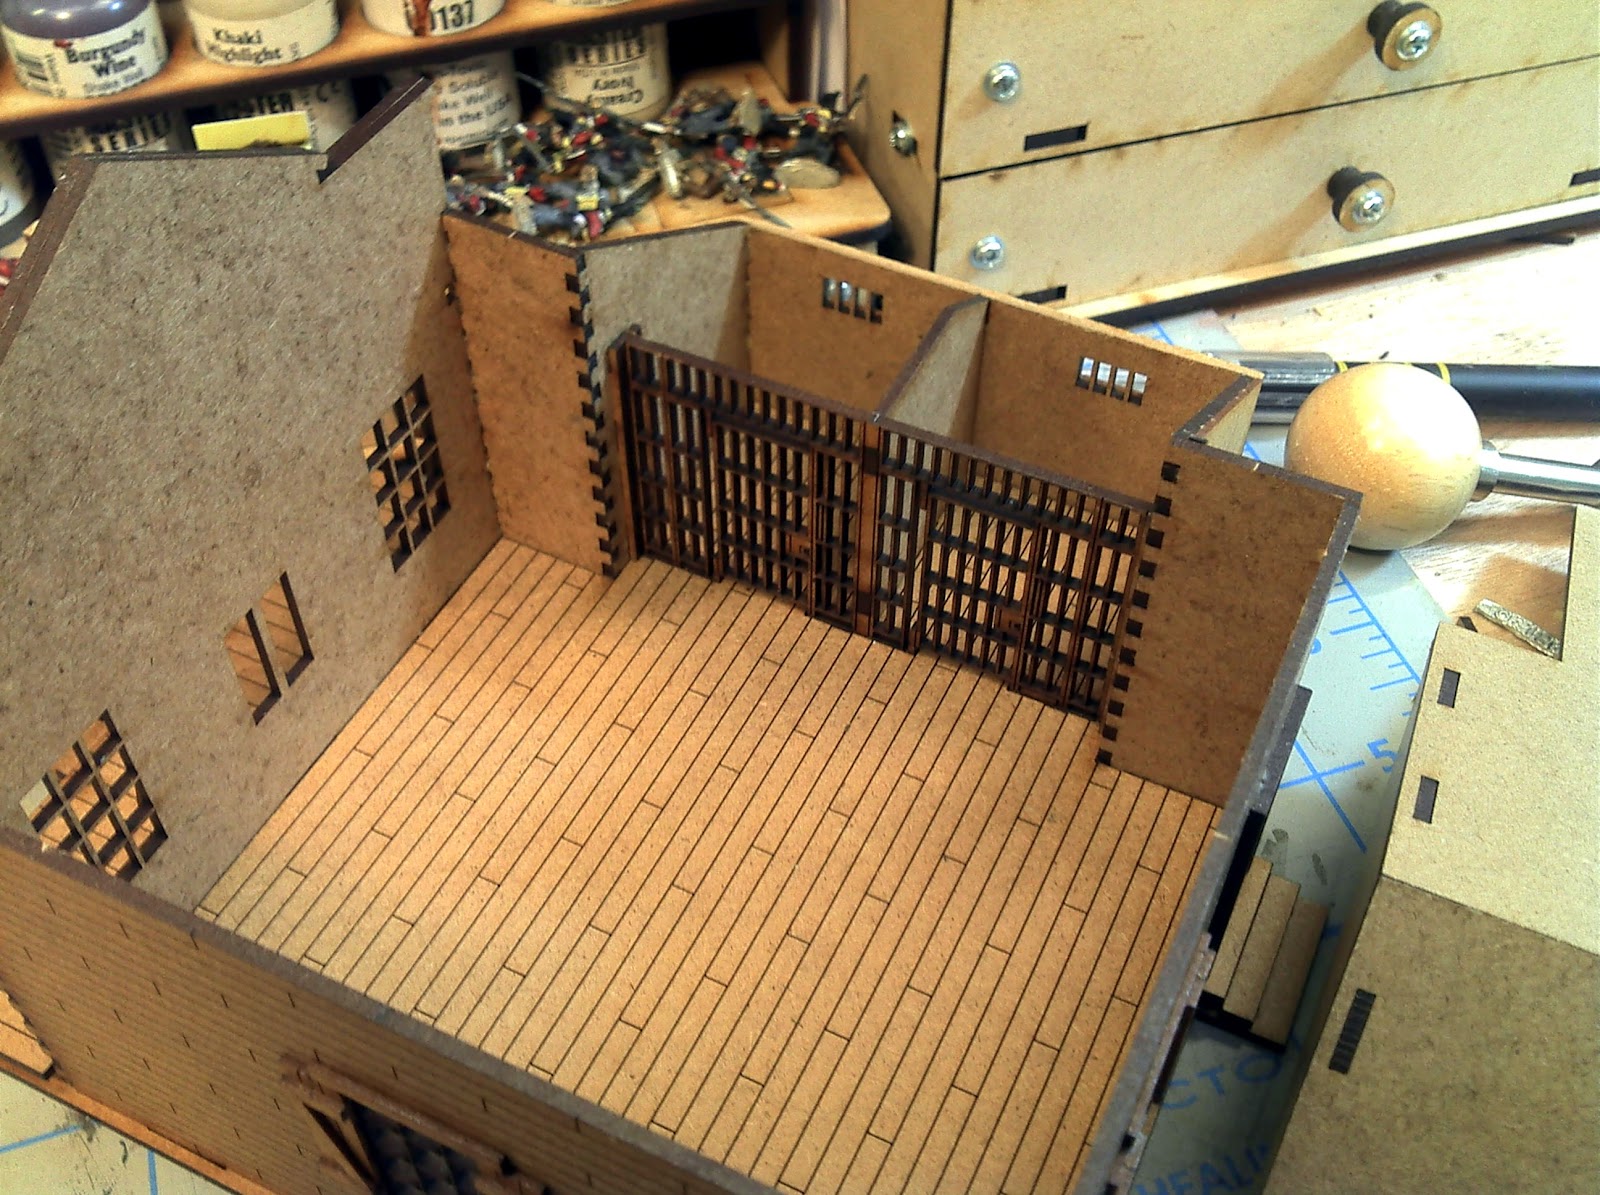
The interior, check out the detail on the cell doors!

With the porch roof in place.

And our huckster staying out of the sun. At least she's not in the cell block!
And with that we move on to the Undertaker's place. I'm probably not going to use this for the undertaker its just way to fancy for such a dower individual. I'll see how things work out as the history of Calamity gets fleshed out.
The Instruction book. Again I dedicated book my favorite kind!
All the parts, there are a lot. I have already assembled the front door and the windows


Sub Assemblies, note that only the front window and door are layered. All the rest are one piece. I do wish that the top left window on the back was placed a little further to the right. I'll have to cut my trim board to get it to fit.

Applying a little weight to get the walls to set right on the base

And a shot from the other side, the front board walk is being weighted down by a 1x2x3 block

Its a long first step from that door on the second floor right now.

Gluing up the stairs

There is a landing now but its still a long first step

This looks a little safer now!

Checking out the line of sight!

Interior supports for the second floor.

And a scale shot. I really need to fix her base.
That wraps up the Battle Flag construction project. The Battle Flag buildings are a bit more expensive than some of the other ones out there but I think they are certainly worth the money.

Citizens of Calamity - Reaper Female Huckster 59025

I know some of you are thinking does he ever paint anything? I do, I am, but since they are competition pieces I won't show them off yet. However, I did paint up the first official painted miniature for my town of Calamity. This is Reaper's Female Huckster from their Savage Worlds line #59025. She should make a great gambler and if I decide that we will be playing Deadlands, the Weird West, on the Calamity board then she can actually be a Huckster (think wizards with cards as the material component).

I actually painted her up for a local painting competition mostly to support the store. She took first place, but don't get to excited about that there were only a total of 5 entries. Hopefully it will help the store competition will grow. I'm not sure she would have even made the first cut at Genghis Con or Tacticon. She's a good solid table top paint job. You will probably see a lot of her in the future since she is currently the only painted semi-western figure that I own. Of course there are a lot of unpainted citizens of Calamity waiting in the wings.

I'm not terribly happy with the base since its so lopsided, it painted up really well but it looks a little weird. I'll take her off of this base at some point and put her on one of the lower profile bases that I have.


Outside the front door of Battle Flag's Undertakers  building


Aetherworks Limited Time International Shipping Deal!

This is the single story Brick Building from Aetherworks.
The Post Office is similar but has a flat roof instead of a pitched roof.
I think everyone has figured out that my big project for the year is my Old West town of Calamity. Things have been moving along and I have a lot of buildings built up and ready for painting. However, I only have one building from Aetherworks. They make a really nice line of buildings but the shipping from Australia is killer expensive. Then someone on TMP mentioned that there was an international shipping deal but I couldn't find it on the website so I fired off and email to them and I had a response this morning (very early this morning). Aetherworks, currently, does have a special offer to ease the pain of International shipping! I grabbed this from the website:


We here at Aetherworks understand the concerns and high costs associated with international postage. There’s no two-ways about it, the Australian Postal system is expensive, and the nature of our building products mean that they have to be sent as large parcels via our postal system.
In order to provide some compensation and to let our international customers know that we are aware of these issues, for at least the next few months until we can find better alternatives, we will be including a special promotion for all international orders amounting to $50.00AUD postage or more of an exclusive Post Office building. The only other requirement is that these orders consist of at least 75% value in Aetherworks products (excluding postage).
This building is based off our Flat Roof Building, except with a vertical plank design and a special “Post Office” sign. It will not be available anywhere else while we run this promotion. It will automatically be added to your order once we start processing it (you don’t need mention or add it into your order). Feel free to contact us for more information or questions.
Here is the direct link to this post on their website: International Shipping
Although its not a break on the shipping itself it is a little compensation for those charges. I'll be checking my bank account to see if I can work up an order to take advantage of this. I can always use another building or two or three. Personally I would recommend AE20010 Town Starter Triple Pack at 99.95AU. The three buildings retail out at 129.95AU so you are saving about 30.00AU right there plus you are getting the Post Office added into that. That's a pretty good deal even with the Australian shipping charges. Remember that this is for a limited time, so if you can take advantage of it, I would recommend doing so.


Calamity - Train Size vs Building Size

In a Old West Building thread, from one of the forums I occasionally frequent, we have been having a discussion about the size of the train versus the size of the buildings. We tend to get very focused on how the engines and cars look with the miniatures that we forget how they might look with our terrain. Anyone that has read my rantings on the subject knows that I'm firmly in the S Scale camp and have stated on more than one occasion that O Scale is just to big. Well, prompted by some responses from the other forum I snapped some pictures of my American Flyer S Scale 4-4-0 and the sole baggage car I own next to some of the western buildings that I have been working on. I took a lot of pictures to give you an idea of how my slightly oversized S Scale models look next to those buildings. This is a bit picture intensive (and really most of my posts tend to be picture intensive anyway so what did you expect?) so let's see how things match up!

First lets take a look at the engine up against some one story buildings.
Knuckleduster/Tri-City Laser. About what I expected, these buildings are short so are almost hidden behind the engine.

Battle Flag - I like this look better. The False front is easily seen bu the rest of the building is mostly hidden.

Sarissa - Precission. Maybe a little on the small side but I can see the False Front . I like the look of this overall.
Now my engine up against some of the two story buildings
Here is a Gamecraft building. Looks about right. I wish the windows were a little higher up.

Here is the Knuckleduster/Tri-City laser Hotel. This one looks pretty good. The location is different because there is not enough depth on my workbench to fit the length of the hotel with train in front of it so I had to shoot to the side.

Battle Flag Photographer's Studio. I consider this one to be just about perfect.
Sarissa-Precision. A little on the short side but not bad looking.
Now let's take a look at how the baggage car looks. It is not as tall as the engine so you can see more beyond it.

Knuckleduster/Tri-City Laser. This is looking pretty good, at least you can see its not completely hidden.

Battle Flag General Store. You can see the entire False Front,  looks good.

Sarissa-Precision. Again this one looks a bit on the short side but you can see a good portion of the False Front.
Gamecraft building. Overall the height look good, if the windows were a little higher I would be very happy.

Sarissa-Precision. Still on the short side but definitely passable

Knuckleduster/Tri-City Laser. Height wise it looks good, but the windows could be a little higher.

Battle Flag. Pretty much perfection in my book.
The last comparison is how the engine and baggage car look against my most dominate structure at this time, the Livery Stable.


I think the Livery stable still looks pretty dominate in these pictures. I'm pretty happy with how these are meshing together. The engine is a bit on the large side as well and is probably not exactly S Scale. I think if it was a little smaller it would be a near perfect match to the buildings.