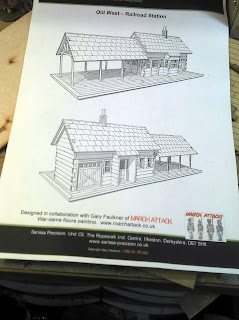
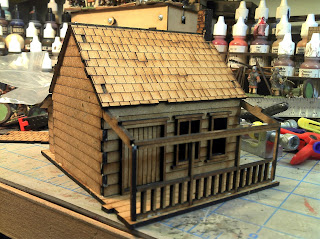
Sarissa has a lot of kits that no other company is making yet. They have a terrific line of Adobe style buildings which would be very useful for a southwest theme, along with the railroad station and all of the different homes in the North American line. If you are looking for the unique kit then you definitely need to check them out. They produce a high quality product with functional instructions (they could be better but are adequate to the task) that produces a good looking building for the table. Their buildings come with flat roofs as standard so if you want a pitched roof be sure you select that option. Unfortunately there is not an option for a pitched roof for their Heroic Large Buildings only for the small and medium Heroic buildings.
Because I have covered my construction methods in earlier posts I'll cut down on the number of construction photos to show you. I did have a number of problems with all of these builds to the point that I thought Sarissa had moved from 2mm MDF to 3mm MDF. I contacted Sarissa and Steve indicated that there is a tolerance in the material and sometimes it is thicker than 2mm. I checked mine this morning (perhaps I should have checked that when I was having problems!) and the MDF for all five of these buildings measures out at 2.5mm thickness. Doesn't sound like much but when everything is cut to such close tolerances that makes a huge difference. Steve offered to replace components if I needed them but since all five have been assembled it seemed pointless to get replacement components for them. Once I figured out that things seemed to thick I just filed down the spots where there is a tab that has to fit into a slot. The chimneys in both houses had to have the bottom cut off so it didn't extend below the floor, I don't think that had anything to do with the thickness of the MDF. I guess the moral of the story is check the thickness of the MDF before you start building so you will know what to do to make everything fit correctly.
Starting off with "House - Stone Chimney #1"
 |
| The Parts |
 |
| The Instruction sheet |
 |
| The Parts |
 |
| The Instructions |
 |
| Gluing the back wall shed in place |
 |
| Gluing in the front windows |
 |
| Test fitting the roof. I filed a bit off of both sides of the tabe as well as the slot they are suppose to fit into. |
 |
| The finished house from the front |
 |
| And a figure for scale. I promise to paint another citizen of Calamity so she won't be so lonely. |
 |
| The Instructions |
 |
| Straight from the bag! |
 |
| Sorted out the parts |
 |
| The back wall, again the tabs have been filed down (in width, not length)so they will fit into the platform slots. |
 |
| Walls mounted to the top of the platform. They served as a guide to gluing the bottom of the platform in place. The tabs actually are long enough to go through both pieces. |
 |
| The two interior walls slotted into place. I had problems with the front and broke some of the MDF but the break is hidden by the walls so not a big deal. |
 |
| And the back, or non-trackside. On most protoypes this wall would be flat and wouldn't have those wings around the door. (That's a prototype thing and not likely to bother your average gamer. |
 |
| gluing the door and window piece on to the exterior wall. |
 |
| Exterior walls in place and the frames for the passenger shelter roof are in place. These also had to be filed down to fit into the slots in the platform. |
 |
| The roof went together nicely. I did file the slots a bit and the slot for the chimney had to be filed as well. |
 |
| A look from the trackside. It looks good, despite my frustrations with getting this one built. |
 |
| A look from the street side. Looks good except that little alcove with the door is going to bother me. |
 |
| Passenger Shelter Scale Shot |
 |
| Building Scale Shot |
 |
| Instructions and Parts |
 |
| Sub Assemblies |
 |
| Gluing up the roof |
 |
| Using my clamps to square up the building and let the glue set |
 |
| Adding the other side to the roof. |
 |
| And the finished building. Fast build. I still had to file down all the tabs though to get them to fit. |
 |
| Finished from the back |
 |
| And a little scale shot. |
 |
| The Parts |
 |
| The Instruction sheet |
 |
| The backside finished. Again I had to file down all the tabs that had to slot down into the base or upwards to hold the roof. |
 |
| And a scale shot. |


