Each of these kits only comes with one "sheet" of parts although there are plenty of little parts on that sheet. The instructions are good, although there is a misplaced line on the GPW's instructions that looks like it is a cut and paste error from the Ox Wagon. I took a few pictures of the build that would help supplement the instructions if you are having problems.
On to the build!
I started off with the General Purpose Wagon, which can be built with or without the canvas cover supports. For game purposes I'll probably go without the supports, it will be easier to get minis in the wagon that way. I think I will have least one with a canvas cover as soon as I figure out a way to do it.
 |
| Gluing the ribs to the bottom of the wagon |
 |
| Ribs in place ready to glue the sides on. |
 |
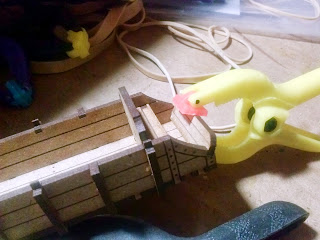
| Clamping the ribs to the wagon sides |
 |
| A clamp forest! Because of the slant on the front of the wagon its hard to wrap a rubber band around |
 |
| Here is the basic wagon carcass ready to go |
 |
| On the far left, the tail gate. 4Ground recommends you not glue this in. I probably will glue it in in the up position. The top three pieces form the bench and the piece on the right is the footrest. |
 |
| Bench assembled and in place with the foot rest being glued in. |
 |
| The front axle has to be able to turn. This is the piece the axle will rest in. |
 |
| Glued in place on the bottom front of the wagon. |
 |
| Gluing on the back axle and wheels. The wheels do not turn, which is fine with me. |
 |
| The front axle sub assembly on the left and the pieces need to add that long piece that holds the horses (I have no idea what that's called). This piece has to be able to go up and down. |
 |
| The front axle sub-assembly completed |
 |
| The front axle is not glue in place it rests in the post that was add to the bottom of the wagon allowing it to turn left and right. |
 |
| The uncovered version of the wagon with the edge rails in place. These can just rest in place and left removable. |
Then I dove straight into the Ox Wagon build.
 |
| Full color instruction sheet! |
 |
| Gluing on the wagon sides, the ribs are to small to actually clamp to, although I tried. |
 |
| The cleats that form the base for the "fenders |
 |
| I have no idea what these things are so I'm going to refer to them as fenders. Two on each side and new real room to get a clamp in there. |
 |
| Gluing on the back axle. I guess the fenders should keep the passengers from falling into the back wheels. |
 |
| Front axle sub assemblies. The center sub assembly will rest in the hole in the sub assembly on the left. I'm sure there are terms for these things but I have no idea what they are. |
 |
| The center assembly from the previous picture glued to the axle. |
 |
| The axle finished complete with trail. |
 |
| I built mine for horses. For Oxen the hitch goes in the front and is curved. |
 |
| Gluing on the pieces that will hold allows the front axle to turn. |
 |
| The finished Ox Wagon |
These wagon builds were pretty straight forward and it was nice to build something that wasn't a building. Both of these will get the same weathering treatment I use on my buildings. Wagons were typically, but not always, left unpainted.


