Latest Updates

Review - Knuckleduster - 28mm Western Building - Barbershop

It was an odd coincidence. A couple of weeks ago I was looking at the Knuckleduster site for some 1812 miniatures (gun crews for those ships that will be here soon I hope) and I was thinking that this is a company that needs a line of Old West buildings. Then "Bang" a week later they announce a line of Old West buildings! These are being manufactured by TriCity Laser Inc.for Knuckleduster. So I jumped on the site and ordered TCL Town Deal #1. This consists of a two-story building, a saloon, a barbershop and a slanted roof kit for the Barbershop. I ordered two Pitched Roof kits one for the saloon and one for the 2 story building. I just don't like buildings with flat roofs. The vast majority of the buildings in the old west have at least slanted roofs and a lot of pitched roofs especially in areas with snow falls. Adobe buildings were typically the only ones with "flat" roofs. Oh and the Tombstone and Coffins set, that was just to cool to pass up.

Generically Kunckleduster talks about their kits having detailed interiors. That's not quite the case so be sure to read the description of each building, that's where it will tell you if there is interior detail or not. But, I was pretty stoked that these buildings are actually made of wood, 1/8" plywood to be exact! That means that my razor saw technique for creating deep grain is going to work just fine. I'm pretty excited now. Oh and the service was great. Made my order on a Sunday and I think I had it by Wednesday, huge thumbs up on that.

I opted to start with the simplest kit just to get a feel for what's going on with these, so out came the Barbershop. The kit came bagged up with a header indicating a length of 5.25" a width of 4.75" and a Height of 3.5", laser cut and engraved out of 1/8" plywood. Don't discard the header though! The assembly instructions are on the back! They are in fact incredibly simple: " Separate all the parts. Snape the sides to the Front and Back and use wood glue to bond, square building with the base, glue on windows and front porch parts. Do not Glue on Roof or Signs." I pulled out the old Titebond (carpenter's yellow glue) and went to work.

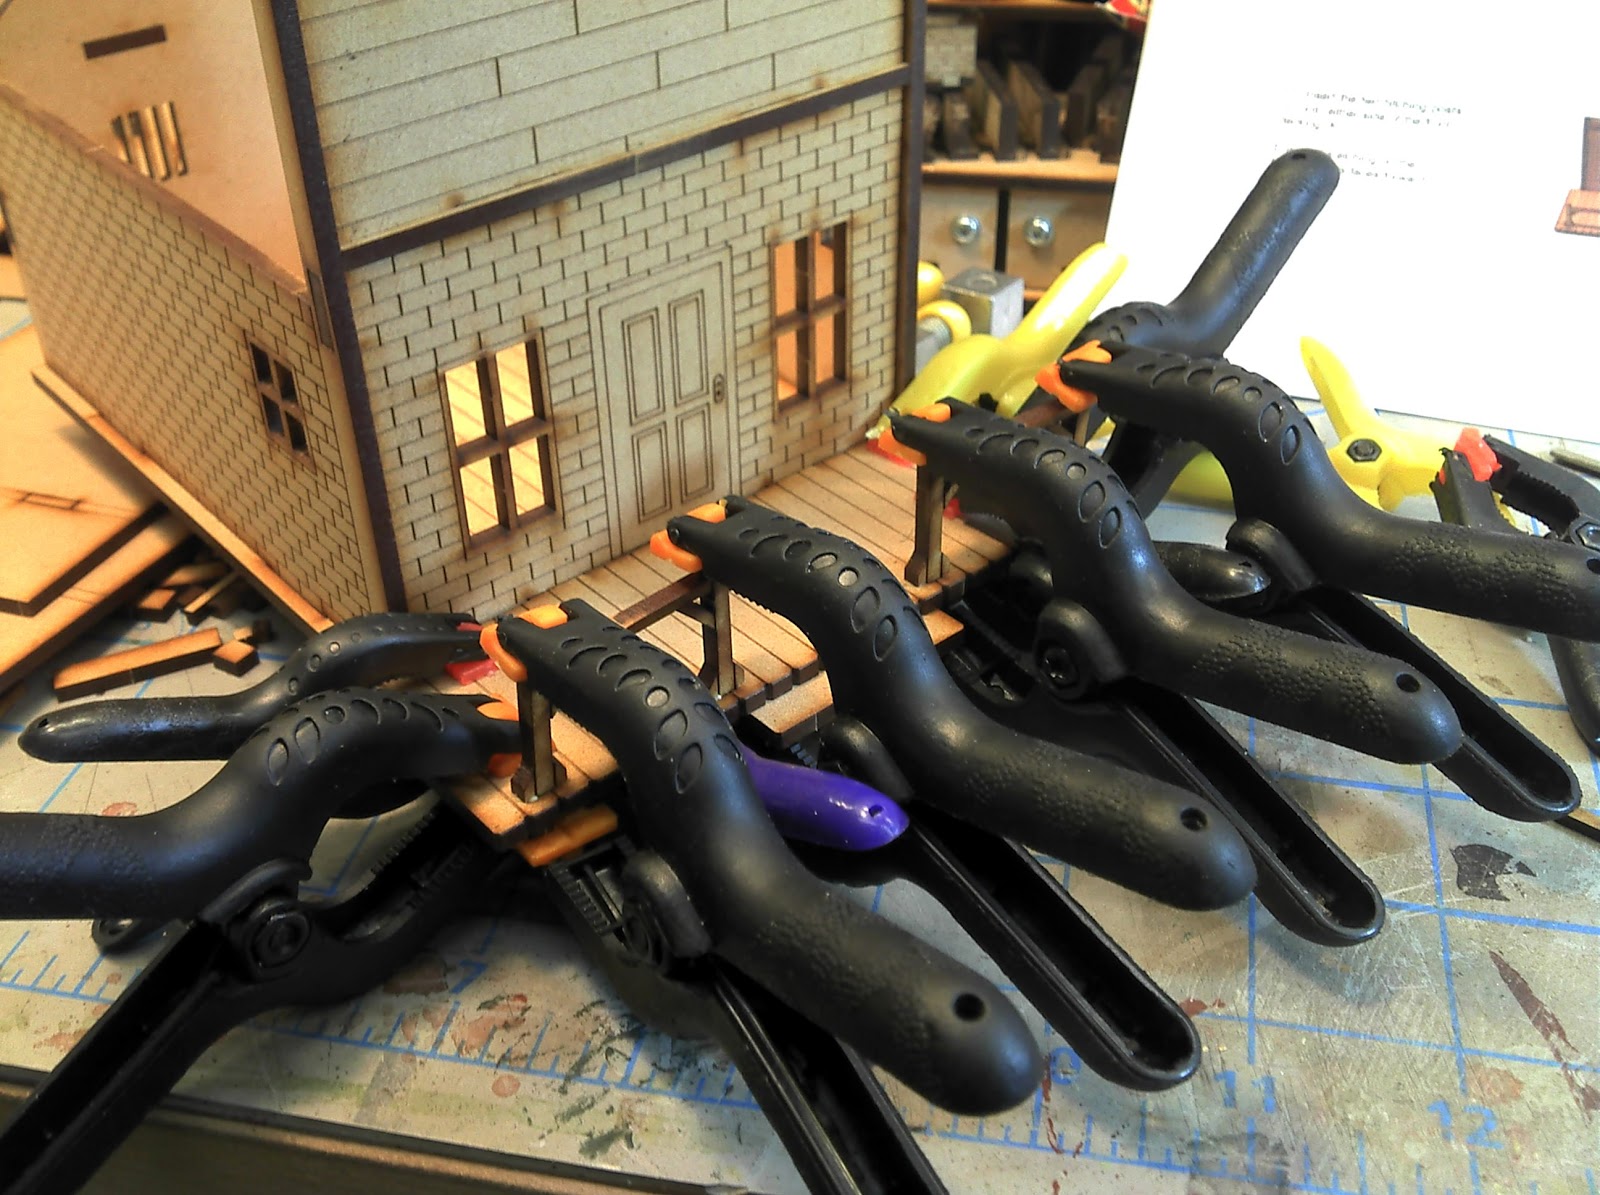
So yes, this is a simple kit and really doesn't need any instructions, however, I think a single sheet with a couple of pictures is still in order. However, assembly is much like the Battle Front and Aetherwork buildings so I didn't have any problems and I pretty much followed my own assembly order. First I scribed the outside wood planks with my razor saw, then attached the window and door frames, using plenty of clamps! By accident I discovered that you really do need to attach the front and back framing pieces first because of the way the walls will fit together. Its a rather clever way to hide the joint and you can see it in the construction pictures. After that it was on to attaching the walls to the base and this one is pretty much finished.

From there I tackled the slant roof. I went ahead and attached the sides to the regular flat roof that came with the barbershop. I'm still not sure if that is right or not because of , but the notch on the flat roof secures it more securely to the building. There is engraved plank detail on the roof, which is a nice touch and the first time I have seen a serious amount of laser engraved detail on a roof.

I think the one thing that I was disappointed with is that the floor on the inside of the building was not engraved, its just the bare plywood. It really wouldn't have taken much to add a floor on the inside. Its the first kit that I have put together that didn't have an engraved floor.

Instructions, such as they are on the back of the header card, gets a 1 out of 5.

Components, I love the components! Plywood is great! I'll still give this a 5 for 5 as far as the components are concerned, however, I was a bit disappointed that the engraved detail didn't go a little farther.

Overall, this is a solid kit, its going to look great on the gaming table and its definitely more than capable of standing up to the punishment that can be given out on the table. So on to the pictures!

 Here are the contents!
Some wall assembly, don't forget the clamps!
The front and back frame pieces need to be glued to the front and back before you assemble the walls. The frame forms the notch that the side walls are going to fit into.

Adding the walls to the base


And the finished product with a few Black Scorpion Miniatures for scale. These buildings are going to look a little small with the Black Scorpion Miniatures. Black Scorpion's Tombstone line is definitely a bit on the tall side though.


And here up against the Battle Flag Saloon. Pretty good match, they will look fine together after some paint work and weathering. The Knuckleduster door is definitely smaller than the Battle Front door.
And here we see the Knuckleduster building next to my only Aetherwork building. Window and door wise the Knuckleduster kit is noticeably smaller than Aetherwork. Aetherwork kits are definitely a bit on the tall side though. Unless you are looking close you really aren't going to notice the difference.


I think the Knuckleduster kits are going to look just fine on the streets of Calamity. I have two more from Knuckleduster kits to go. So hopefully some more progress this week.

Veterans Day

As I try to come to full awareness after a late night of gaming I have to thank the men in my family that helped make these things possible.

My father who served in the US Marine Corps just prior to the Vietnam War

My Great Uncles who served in WWII
Jerome with the 1st Armored Division, North Africa to Italy
Stanley, Bombardier , 390th Bomb Group (Heavy), 568th Bomb Squadron
DFC, Purple Heart (awarded for wounds sustained on his last mission over Berlin)


Donald, 23rd Infantry Division (Americal)
Purple Heart (Died from wounds sustained in the retaking of the Philippines)

Battle Flag Saloon - Adding some detail

I did get to spend some time working on the Battle Flag Saloon this week. Nothing groundbreaking by any means but its certainly looking more "finished" than before. I was at Caboose Hobbies here in Denver and picked up some "O" Scale shingles to try on the roof. The first is called Truewood (covers 27 square inches for $9.98) and comes from Builders in Scale. The pack I picked up is rustic oak and they really are made from oak. The other shingles came from Wild West Scale Model Builders (Shake Shingles covers 38 square inches for $10.95). These shingles are a heavy weight paper and have also been laser cut. I ended up using the ridge cap from one of these packs to go along with the Truewood shingles I used. Hopefully I can blend these together during the weathering process. If I can't I think I have enough leftover Truewood shingles to do the cap, and I might do it anyway since the "look" is just not growing on me.
After shingling the roof I grabbed some stripwood and added some trim to the Saloon. This covered up the joint where the walls come together. I also added some trim to the roof on the back side. All of this wood was scored with my razor saw first to create a deep grain pattern. Its hard to see now but will be much more visible after the building is painted and weathered. I have tried to distress the boards on the building itself with my razor saw which mostly just leaves fuzz behind and seems to want to remove a layer from the building rather than make the deeper grain pattern that I was hoping for. My order from Micro Mart that arrived yesterday has a tool in it that I hope will let me get that distressed look that I want. Hopefully I'll get to try it tonight.

Next steps are to go through this same process on the General Store and the Photographer's studio. I won't put the shingles on the roof of the General Store though. Battle Flag said that they could get me a new roof which means I won't have to mess around with the extra work to make it look right. Great guys at Battle Flag! Of course there are pictures to show the progress so far. If you were really sharp eyed you would have picked up on the changes to the Saloon in the pictures that were in the Aetherworks review yesterday.

First up the products I used

Shingles applied to the roof


Adding some trim to the building to cover the joints. Obviously not as thick as the MDF, but I don't think you will notice after painting and weathering.


Review - Aetherworks - 28mm Western Buildings - Brick Building

I purchased a building from Aetherworks out of Australia and it managed to beat my order from Sarrisa-Precision that is coming from the UK. To be fair I'm pretty sure my order from Sarrisa (and Foundry for that matter) are probably stuck in NY. New York is having a tough time first the Hurricane Sandy and now they are getting pummeled by Athena. Who knows when anything from the UK is going to get through that mess. Still I was very happy to receive the kit from Aetherworks and add another building to the Wild West collection.

It was pretty well packaged and it took me a minute or so to actually get to the contents.  I also ordered the extra detail kit that includes door and window frames (these come as part of the stock kit with Battle Flag) for the building. They also sent me 3 complimentary signs! Very nice, they sent the Bank, Sheriff and Marshal signs. One of those will end up the front, but not until after it has been painted. Since I'm a firm believer in pictures, here is what you get:


Construction is really straight forward. I took a lot of pictures of the process, and yes there are lots of clamps in the pictures and you can take a look at those below. Overall, this kit really went together well. The MDF is slightly different than what I was used to working with from Battle Flag and 4Ground. It is much thicker, I'm guessing 5mm, and seems to be a little harder. I was able to create distressed boards with my razor saw that can be seen, they didn't just create fuzz. Like any laser cut kit there is a front and a back to all the pieces. Double check and make sure you have the side with the detail glued down with the detail visible! I didn't have any assembly miscues with this kit. Part of that is that it is simpler kit than the ones from Battle Flag. Aetherworks are scaled a bit differently from Battle Flag as well. The Aetherworks building looks like it is scaled specifically for the Black Scorpion miniatures. In the long run I don't think you are really going to see the difference during a game or even with just a casual look.

The instructions were really good. They were specific to the building I purchased (that's always big for me) and each step had pictures. The only problem I had is that there is a lot of white space and some of the pictures would have been much more useful if they had been larger so I could see how some of the small parts should fit. In particular there is no clear picture of the supports for the top of the false front. I had to fiddle with them for a minute to make sure I had them in facing correctly. So instructions get a nice solid 4 out of 5.

Components are really nice. Again Aetherworks uses a thicker and seemingly harder MDF which allowed me to create distressed boards with my razor saw. Almost all the parts practically fell out of the frame. Smaller parts stayed in the frame and were easy to remove. The engraving was sharp and looked good. If anything the bricks were to sharp looking, some distressed brick would have been nice (and yes it can be done with a laser, check out my post on Monster's brick freight house, HO scale and featuring distressed or worn brick). Still that's a pretty minor point and most gamers are not going to notice. 5 out of 5 on the components.

What disappoints me a bit is that they don't go farther and include some instructions on painting and weathering the buildings. Especially the roofs. Aetherworks doesn't even mention the roofs after you have assembled them. Battle Flag does provide some extra strips of MDF to at least create the appearance of a tar roof and you can buy shingles from them if you want.

Small gripes really. This is a quality kit, it looks good when mixed in with the kits from Battlefront and Calamity gains its first brick building! On the the assembly pics!


So here is the basic building with the assembly finished


If you purchased the additional door and window frames then you get to keep going!


And now the finished product with the extra frames but still minus the sign (that will get mounted after painting)


And now with some Black Scorpion Miniatures for scale


And now against the Saloon from Battle Flag


The streets of Calamity continue to grow